Wednesday, December 19, 2012

My Husband was on TV Peanut Butter Cookies


Anyone who knows my husband knows about his crazy good memory. This memory of his often puts him in the center of attention. Well, it was no exception when he went to the Jeff Probst show as an audience member of a Survivor-themed episode and ended up being interviewed on TV by Jeff Probst, himself, because of his ability to remember the order that every single Survivor player on every single season (there have been 25 seasons so far) was voted off. He is the ultimate Survivor fan and he got to prove it to the world.

Mike Showing Off on the Jeff Probst Show!

It was so cool watching him on TV and definitely a cause for celebration. Mike is always begging me to bake cookies. "Can you just make normal cookies? Not your quinoa, healthy, weird experiments." One of his favorite cookies are these peanut butter cookies. They are absolutely delicious. Haha! Joke's on him. What he doesn't know is that they ARE healthy and that his celebration cookies were very much an experiment. No quinoa, though. I bought a container of peppermint (his favorite) ice cream and figured if the cookies were a disaster, there was a backup plan. This recipe originally came from the blog Handle the Heat (before my adjustments) and it is a hit every time I make it. I have given the recipe to many family members. 

So, yeah, this recipe is not one of my grandmother's recipe. But, this blog is also a celebration of peanut butter. Pesto recipes will also be making appearances :)


I had been planning on surprising Mike with these cookies all day. On my drive home I realized I didn't have eggs. I was so disappointed until I remembered that I had learned from Pinterest that flax seed can substitute for eggs. When I got home I saw that Mike had bought eggs, but even so, I was determined to follow through with my experiment and see what happens when you substitute flax seeds for eggs.


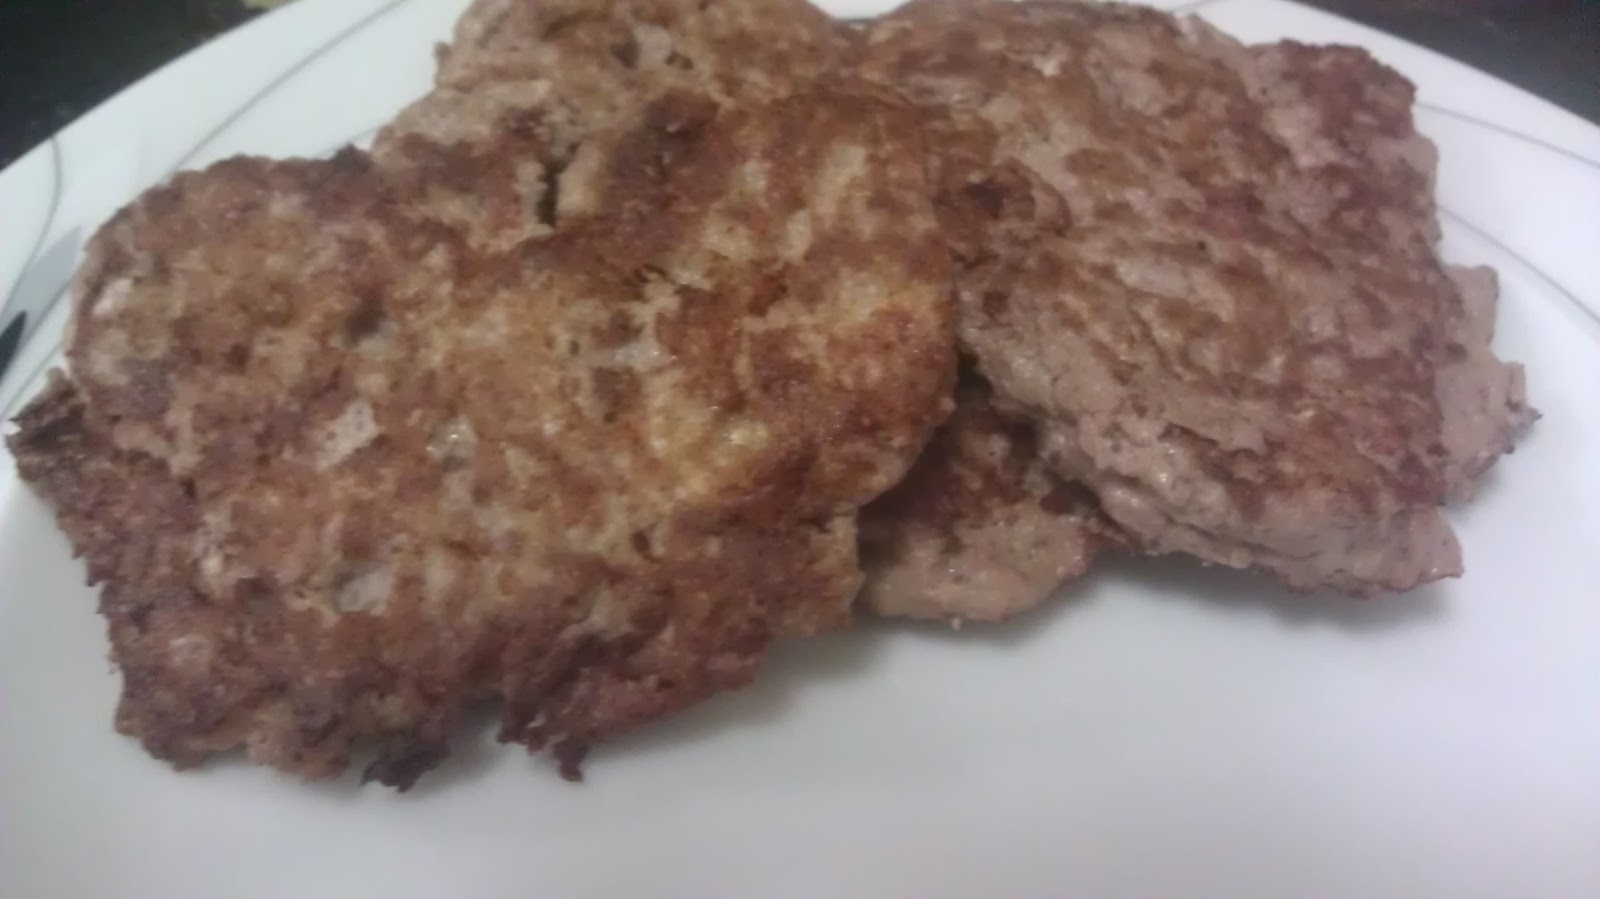
The batter was more dry than usual, but the cookies turned out surprisingly to be more moist than ever. They were absolutely delicious and Mike had no idea that anything was different and gobbled them up. And they were so super healthy! This was such a success, next time I may try and make them even more healthy by cutting down on the sugar.

Perfect Vegan Peanut Butter Cookies


(Yup, I used the Kirkland Peanut Butter that was recalled, only because it had already been opened and no one had gotten sick from it. This is the best peanut butter ever. Each container has such a generous amount of peanut butter in it, it mixes evenly, and is delicious. Too bad that it was getting people sick, huh?  I have 3 more in my cabinet which I will regretfully be returning the next time I go to Costco.)

The Best Peanut Butter Cookies - Healthy and Vegan

1) 1 cup peanut butter
2) 1 cup brown sugar 
3) 2 tablespoons of flax seed mixed with 6 tablespoons of water (or two eggs if you don't have flax sseed)
4) 1/2 cup whole wheat flour
5) 1/2 cup old fashioned oats
6) 1 teaspoon baking soda
7) 1/2 cup chocolate chips

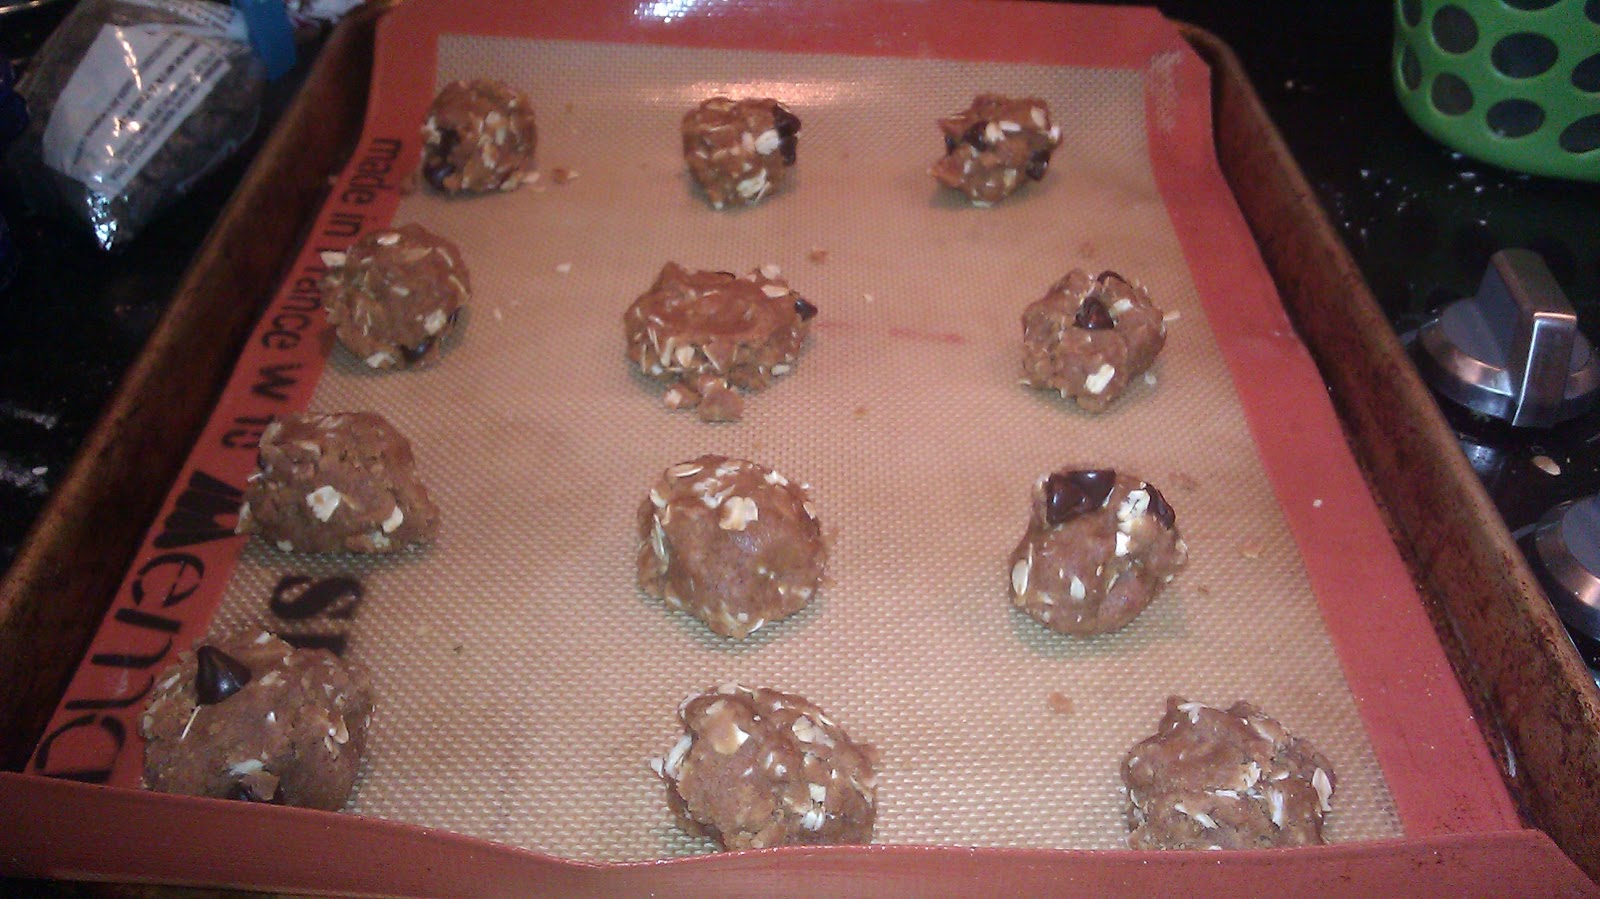
Preheat oven to 350 degrees and spray baking sheet with PAM or line with parchment paper. Beat peanut butter and brown sugar with an electric hand mixer on medium speed until incorporated. Add the flax seed and water mix, slowly, until mixed in. Add in flour, oats, and baking soda. Stir in chocolate chip with a fork or spatula. Drop balls of dough onto the baking sheets. This recipe made 2 trays of 12. Bake for 10 minutes. Cool on a cooling rack. 

Friday, December 7, 2012

Cheese Ejjeh


Another version of ejjeh (Syrian Latkes). This one is with cheese instead of meat. It isn't the healthiest food, that's for sure, but Chanukah comes but once a year. (I don't suggest eating this all eight days, though.) 

It is essentially a cheese omelet, as the ingredients are just egg and cheese. 
But it is the cheesiest cheese omelet ever. 
And did I mention it’s fried! 

By the way, a fellow half-Syrian friend of mine (shout out to Dave!) told me that 'ejjeh' means 'cake'. 
 If you are a cheese lover than this recipe is for you! 
Doesn't it look good?
           And just like the meat ejjeh, you can eat this in a sandwich with tomato and lettuce. 
I was out of lettuce and tomato, so we had to do without. 
But there was no way I was making dinner without something healthy. So I sauteed mushroom, eggplant, and pepper for the side. That way I got to enjoy my fried cheese sandwich guilt free. 

Cheese Ejjeh

1)8 oz. of cheese (mozzarella, cheddar, I used Monterey Jack)
2)3 eggs & 1 egg yolk
3)salt & pepper to taste
4)oil for frying

In a bowl, mix together all of the ingredients.  Heat oil on the stove. Drop 3 large spoonfuls of cheese mixture and cook for 2 minutes on each side (until it bubbles). Continue until the cheese mixture is all used up, stacking the pancakes on a plate lined with paper towels to absorb the extra oil.                               


Tuesday, December 4, 2012

Meat Ejjeh - Perfect for Chanukah


Ejjeh B’Lah’Meh (Meat Pancakes) is basically a meat latkah and would be a perfect food to make for Chanukah. Lah'Meh means meat. Not exactly sure what ejjeh means. One Syrian cookbook translated it as fritter, another said omelet, and my mom wasn't sure and said she thinks it means pancake. But you get the idea. Basically it is anything mixed with egg and fried. There are all different types of ejjeh (which I will be posting about soon). My grandmother ate a lot of ejjeh when she was a child during the depression. Ejjeh is the perfect food to get the most bang from your buck. During times when the money was tight and families had a hard time putting food on the table, ejjeh was a way to fill a lot of mouths. Basically ejjeh is a way to take whatever ingredient you have (in this case ground meat) and turn it into dinner for the whole entire family.

Ejjeh B'Lah'Mah is meat mixed with eggs flavored with all spice and white pepper. 
                                                                          That's it.

Fry it.

Doesn't take long before it is ready.

Add bread and eat it as a sandwich. 

You can top it with ketchup, tomatoes, lettuce, or even guacamole, like me!

But truthfully, it is flavorful enough to be eaten on its own.


Ejjeh B'Lah'Meh - Meat Pancakes

1)1 pound ground beef
2)4 eggs plus 2 egg whites
3)1 tablespoon all spice
4)sprinkle of white pepper (I used black)
5)oil for frying

In a bowl, mix together all of the ingredients.  Heat oil on the stove. Drop 3 large spoonfuls of meat mixture and cook for 2 minutes on each side (until no longer pink). Continue until the meat mixture is all used up, stacking the pancakes on a plate lined with paper towels to absorb the extra oil.
Feeds 4 people. Or just 2 if a hungry husband is involved.                                                                                        

Sunday, November 25, 2012

Mandelbread


There is nothing Syrian about Mandelbread. In fact, Wikipedia says: "Mandelbrodt, Mandelbrot, Mandelbroit or anglicized to Mandelbread, is a dessert associated with EASTERN EUROPEAN JEWS. The Yiddish word mandelbrodt literally means almond bread. It is made by forming dough into a loaf, baking it, slicing the loaf into oblong cookies and then baking again. The crunchy, dry cookies were popular in Eastern Europe among Rabbis, merchants, and other itinerant Jews as a staple dessert that kept well."

But Mandelbread is a dessert that I associate with my grandma and with my Syrian cousins and aunts and uncles. My grandmother was born in America and so she wasn't only exposed to Syrian influences. She probably had some Ashkanazic (Jews from Europe) friends and was exposed to Mandelbread through them. 

My grandmother did not write down the Mandelbread recipe in the cookbook she made for my mother. I believe that this recipe is from my mother's first cousin, Mimi. When I was a little girl I would spend summers in West Long Branch, New Jersey so I could hang out with Mimi's daughter, Ida, who is my age. There I was exposed to some Syrian foods that even my grandmother did not make. And of course there was Mandelbread. Mimi's father, my Great Uncle Izzy, cherishes the Mandelbread that his wife, my Great Aunt Renee, makes and I know that he loves me because he always lets me have one! 


This picture is upside down, right? I don't know why that is...

Anyway, here is the recipe:


Mandelbread

1) 3 eggs
2) 1 cup sugar
3) 3/4 cup oil
4) 2 tsp vanilla
5) 3 tsp baking powder
6) 3 cups flour or enough so batter isn't sticky
7) 1 tsp of cinnamon

Preheat Oven to 350 degrees

1) Beat eggs
2) Add sugar
3) Add oil
4) Add vanilla
5) Add flour, baking powder & cinnamon

Feel free to add chocolate chips, nuts, or any flavorings

Put parchment paper or PAM on a cookie sheet
Form the dough into two logs
Sprinkle with cinnamon and sugar
Bake for 30 minutes

Lower oven to 300 degrees
Cut and lie on sides in two trays
Return to oven until crisp (about 30 minutes)

I made one log plain, and I added walnuts to the second one. The top one in the picture is plain, the bottom one is with walnuts. Of course they were side by side, but for some reason my picture flipped again. I will have to get to the bottom of this picture flipping business. 

If you have extra Mandelbread, just freeze them. They are delicious eaten straight out of the freezer.


Monday, November 19, 2012

diy fashion!

So as you readers can probably tell by now, our new and re-invented blog has no rules and no formula--Nomi and I kind of do whatever we want. (She even featured a music video for barenaked ladies.)
Therefore, in this post, I won't just be commemorating my grandma who was a great cook and hostess, but a grandma that was talented and went the extra mile for her daughter and grandchildren. How? Although I was too young to properly remember my grandma, the entertaining stories I sometimes hear about her show me how she was always making things for her kids--sewing doll clothes or making pretty headbands for birthdays.
Knowing this about my grandma made me feel even more connected to her because i love to do things like that too! Although i don't know how to sew, i have many ways around that (hello, hot glue gun!) and i always look online, especially places like pinterest, to inspire new ideas like baby accessories for Katie!
Nomi and I have decided to dedicate a night a week to "craft night" where i sleep over and we do a project. A third sisterly bonding, a third settling her into her new apartment, and a third doing fun, inventive crafts for the home, Katie, or us. Hopefully we'll also post what we create!


The first DIY fashion project i'm uploading is just how to make a simple bow. So quick and easy to make, and very in style now, i can't help but be in love with these! Now that bows are super in, i can wear them all the time, to my delight! (I'm the type of person who loved bows before they got popular.)

This tutorial is courtesy of YULA fashion club.

You start with a long piece of fabric.

The wider and longer it is, the bigger the bow will be. I started with a piece of ribbon that i cut to my liking, but you can really start with any scrap of material. the great thing about these DIY bows is that many different kinds of fabric work!

Next, you fold the fabric almost like you would a letter. You basically make the ends meet in the middle. then glue this down with a hot glue gun.

Once you do this, you can just crinkle up the middle and you'll see the fabric turn into a bow. Before gluing or spending time and effort on a bow, you should do these first steps quickly to see if its the right material for a bow. Some are too thick, too thin, and these will just not crinkle the way you want them to.

Now its time for the end! You just need to get a small piece of fabric, even shorter than your pointer finger, and wrap it around the middle. Option number one would be to tie the fabric piece tightly. However, this may make the folded bow fabric fall out and not last. Option number two is use a glue gun to glue everything tightly in place. You can even hand stitch everything together if you want it to be very secure.

And voila! Your bow is now complete! To be able to wear it in your hair, just slide on a bobby pin in the back like so...

or if you want it to be super sturdy for bigger bows, a barrette.


And now my finished bow can be added to my quickly growing collection! But don't stop with just using them as hair accessories. they can be glued or sewed into clothing, shoes, or even rings!

I sent my 7 year old niece a bow and she could not believe that I made it myself! She was so impressed!

So I hope you liked the first blog post that has nothing to do with food  in our new and improved no rules blog! I promise we will not be dipping these bows in peanut butter or pesto!


Wednesday, November 7, 2012

Banjan (Eggplant)


This meal was made possible because of that extra hour which most people get to sleep through, that extra hour in the morning when we fall back and say goodbye to Daylight Savings Time. My baby woke me up at 5 AM this past Sunday. If it was the previous Sunday it would have been 6 AM, but not that day since we changed the clock. And when you're a mother and your time is not your own and you can never get anything done because your baby makes a 5 second job take 10 hours, then an extra hour in the day can really come in handy (even if you are dead tired).  And so with that extra hour I was able to make this delicious Banjan dish while I was entertaining my baby (or being entertained by my baby) playing together with all of her toys, reading books, dancing to music, showing her the hand movements to The Itsy Bitsy Spider (which makes her laugh and laugh) and teaching her "Head, Shoulders, Knees, and Toes" (she kept touching her head). Talk about multi-tasking! It was a really fun morning and eventually at 9 AM (which used to be 10 AM), she fell asleep watching The Barenaked Ladies Video of "Another Postcard." If you've never seen it, you should definitely check it out; It is hysterical!


Chicken and Banjan (eggplant) another one of my favorites!


First put chicken in pan (I used 2 thighs and one chicken breast on the bone) and brown them on both sides.  I used frozen chicken. I tend to stock up on chicken and freeze it because a trip to the market is a pain in the neck now that we moved and no longer live one block from the Kosher market. Believe it or not, this recipe works well with frozen chicken.


Put 2 tablespoons of water in the pan and simmer chicken for 1 hour.


I used 2 eggplants but regretted not making more as I was licking the plate clean during dinner time. As you know, veggies shrink and while it seems like you are making a lot, if you have the time and patience use as many eggplants as you desire! Slice them and spray PAM on them, and cook in oven for about 8 minutes on each side.


When the chicken has simmered for an hour and looks cooked add the eggplant to the pot and try to coat the eggplant with the liquid in the pot. Add allspice and salt.  Now simmer for 30 minutes or longer (the longer, the better).  Check on it often to make sure that there is still liquid, and that the eggplant is not burning.


Warning**This dish is more of a side dish than a main course (depending on how much chicken you use of course!)

Banjan

1) 2 (or more) eggplants 
2) 4 pieces of chicken pieces
3)1 teaspoon of allspice
4)1/2 teaspoon of salt
4)1 teaspoon of oil

In a pot, brown the pieces of chicken on both sides in the teaspoon of oil. Add 2 tablespoons of water and simmer for an hour or until chicken is cooked.

Meanwhile slice the eggplants and place them on a tray. Spray with PAM and cook in oven on 350 degrees for 8 minutes on each side.

When the chicken has cooked, add the cooked eggplant to the chicken. Season with the allspice and salt and mix the liquid that is in the pot with the eggplant. Simmer for another half hour. If you have the time you can simmer it for even longer, just make sure to keep checking on it to make sure that it isn't burning.

Monday, October 29, 2012

Cheese Fila and Katie's Birthday Party

My first recipe post since my LONG break. So, it's  got to be something special. Can't think of anything more special than cheese fila which were made for my baby's first birthday party. It's the perfect come back recipe!

I went shopping after work on Friday to buy the ingredients for the fila. I only had one hour to make the fila and I had other things to cook as well, but I was determined to do it. And excited because I was making one of my favorite of my grandmother's recipes for my daughter's first birthday party and so this was a fun thing. My daughter was very happy to see me after I had been away all day at work and wanted me to hold her. How am I supposed to make fila with her in my arms? I kept putting her down and she would get distracted by all of her birthday toys and then 5 minutes later she wanted me to hold her again. Which was fine. After all, she didn't ask for this party.  It's technically for her birthday, but really it's for my husband and me and our friends. Right? First thing I had to do was mix the 2 type of cheeses together. Time was a tickin'. I put the farmer cheese into the bowl. I poured the mozzarella cheese on top of it. And immediately I smell it. The mozzarella cheese I had just picked up from the market moments before was rotten. Gross. I had to throw it all away and just use whatever cheese was in my fridge. I had a little bit of feta, a little bit of tomato and olive cheese, a little bit of cheddar. I was going to make this work. Even if things weren't going as planned and I was running out of time. I was determined!

 I had to throw away a whole entire package of cheese!

 I mixed the cheeses together. My daughter was playing nicely now with her toys. Phew! And now for the time consuming part. It's easy but time consuming. Really fun thing to do with a friend, parent/child, or spouse.
First I rolled out the fila and cut it into 3 pieces. My grandmother used to only cut it in 2, but 3 goes farther! And I like the fila better when they're smaller. Notice my 3 pieces are completely different sizes. Try to make your pieces more equal than mine. Or not. Since mine did come out delicious!
Now put all 3 piles on top of each other. You want to work somewhat fast because the fila dough dries up when it is out too long and becomes difficult to work with. Take each piece, one at a time of course, and spread melted butter on it with your pastry brush and then fold.
Now put a little bit of cheese on each corner and fold into the shape of a triangle (up down up down).


The fila were delicious and my daughter's party was so much fun! 

The party was Sesame Street themed. Here are some pictures of my Sesame Street creations. And yes, most of my ideas were inspired from Pinterest.

Elmo, Oscar, and Big Bird Veggie Platters. Cookie Monster Donuts.

Homemade mini vanilla donuts with blue frosting, marshmallow and chocolate chip eyes with a cookie in their mouths!
While I based Oscar and Elmo from multiple posts on Pinterest, I'm proudest of Big Bird because he was my own creation. I made my Aunt Sharon's delicious corn salad (corn, olive oil, vinegar, salt, and basil), made onion dip eyes with olive eyeballs, and used baby corn as the beak!


Cheese Fila

What you need:
1)1 package of fila dough
2)Butter (at least one stick)
3)8 ounces mozzerella cheese
4)8 ounces farmer cheese
5)2 eggs
6)Pastry Brush
7)Sesame Seeds (Optional)

Mix mozzerella and farmer cheese together in a medium bowl with the 2 eggs. Mix until combined.

In a cup melt butter. I did not specify how much butter because I never know. What I do is cut half a stick of butter and melt it for 30 seconds in the microwave. I melt more as needed throughout the whole process.

Open the package of fila dough (usually it is sold in the frozen section, so make sure it is defrosted before you use it.) Roll out the fila dough and cut it into 3 even sections. Pile the 3 sections on top of each other.

Take one piece of fila and use the pastry brush to brush the melted butter onto it. Now fold it in half, using the butter to help seal it. (You do not want to skip this step. The butter is part of the reason that cheese fila is so amazing!)

Take a small spoonful of the cheese mixture and place it on the end of the fila and fold over into a triangle, and continue folding until you get to the end. Repeat with each piece of fila. As you complete one, put it on an ungreased baking sheet. Put them on the tray with the points facing inwards and so that they make squares. Like this picture:
When the tray is full spread melted butter on top of all the fila and sprinkle sesame seeds on top.
Now you can either bake them or freeze them, or probably both.

Freeze them on the tray so that they don't stick together. Then move them to a tupperware and make sure to put wax paper between each layer.

Bake on 350 degrees on a baking sheet lined with parchment paper for 30 minutes or until slightly brown and toasty.


Wednesday, October 24, 2012

Sahlab!

Well, like Nomi said, we are back and better than ever! So since she explained everything already, I'll jump right in with a recipe! Not without my fair share of mess ups, I finally made sahlab (pronounced sechleb), which may have a funny name but tastes delicious! Basically a milk pudding, this simple recipe is great for anyone who likes milk, vanilla, or pudding.


So, without further ado, here's the recipe: (makes about 5 portions)

Sahlab

4 cups milk
1/4 cup of sugar
4 tablespoons corn starch
1 teaspoon vanilla

Put 3 and 1/2 cups of the milk in a pot. the other 1/2 cup mix with the corn starch until well dissolved. Make sure to stir it well before you add it to the pot--otherwise it clumps.
Wait until the milk in the pot is almost boiling and add the rest of milk with cornstarch, the sugar, and the vanilla.
(I'm not really a lefty--but i definitely wanted to hold the phone in my right hand!)

As soon as everything is in the pot, make sure to stir very frequently, or else disaster may be on your hands.
Exhibit A:

I turned my back for 10 seconds and come to find it overflowed! Don't make this mistake!

But not to worry, its all cleaned up. (Although I clearly left a few streaks on the stove. Yuck!)

(Yes, that's Katie's highchair in the background :)

It will take some time to get the right consistency (which is thick), but after about 8 minutes you can stop stirring and remove from heat. Sadly, I think I stirred for a little too long, so it ending up burning a bit. I know--I seem like a disaster! Trust me, it's a one time thing! Plus, it made a cool configuration at the bottom of the pot.

Then all that's left to do is poor into ramekins or cups--whatever you have--and sprinkle cinnamon on top--the best part!


As you can see, I like a lot of cinnamon on my sahlab. It's totally not that a lot came out of the container at once! (for real--that was one disaster that didn't end up happening!)

Well, there you have it. Sahlab! Mine may have been a small fail, but this is a delicious recipe that is a great desert or snack! I might just leave the job of cooking it up to my mom or sister from now on!

Sahlab is delicious eaten hot or cold. Keep it in the fridge. The part that sticks to the bottom of the pot (even the burnt part) is delicious. All my siblings used to fight to eat the "pot" when they were little kids (before I was born.)