Showing posts with label Naomi. Show all posts

Monday, September 16, 2013

Rice and Honey (Riz b’Asal)

Sarah and I wish everyone a sweet new year! We hope you had a wonderful Rosh Hashana, an easy fast and meaningful prayers on Yom Kippur...and to ensure that your year remains sweet, we present you with our recipe for a delicious Syrian dessert that would be perfect for you to serve on Sukkot.


My grandmother included the recipe for this rice and honey pudding in the cookbook which she made for my mom, but she did not specify how long it takes for rice and honey to cook.  I expected it to take 20 minutes or so because after all that is how long rice takes to cook normally. After 45 minutes, I called up my mother and said, "This is taking forever! I want to go out and I'm stuck at home waiting for the rice and honey." My mother told me that yup, it takes about an hour to cook. So, if you have an hour, this recipe couldn't be easier. If you like honey, then this recipe is for you. (Disclaimer: I do not like honey. I do wish that I did because the texture of this dessert is amazing. My mother and brother were the consumers of this dish in my family. This year Mike tried it for the first time and loved it.)

First you mix the rice, honey and water together in a big pot.


You leave it covered on medium/low heat for an hour. Check on it after 45 minutes and see how it is doing.  You know it's done when all the liquid is absorbed and it is very thick and somewhat hard to stir. It may even stick to some pots (not mine because I used a stick proof pan). Add the corn starch, which has been diluted in some cold water and cook for 5 more minutes.

After you take it off the fire, mix in rosewater, according to taste. I used 2 teaspoons, but add as much as you feel it needs. I used orange blossom water instead of rosewater. I prefer orange blossom water because it has a more mild flavor than rosewater. It is very similar and a good substitute. If this is your first time tasting rosewater, I suggest using the orange blossom instead.

This is what my bottle of orange blossom water looks like. 

Then take a medium size plate (I used 4) and spoon the rice mixture onto the plate to make big patties. Make sure you use real plates and not paper plates because it will stick to the paper. If you have wax paper you can put it on top of the rice and honey patty and make layers. I did not have wax paper so I just used 4 different plates.


Cool to room temperature before serving. To store, cover the plate with saran wrap and put in the fridge.

Rice and Honey:

1 cup rice

1 cup honey

5 cups water

2 tablespoons of corn starch

2 teaspoons rose water or orange blossom water (according to taste)

Mix the rice, honey and water together in a big pot. Bring to a boil. Reduce the heat to medium until it is soft and thick  (approx. an hour). Dilute corn starch in a little bit of cold water (I used 6 teaspoons) and stir and add to pot. Cook for 5 more minutes and then take off of the fire. Add the rosewater or orange blossom water to the rice and stir. Pour into individual dishes. Cool to room temperature before serving. To store, cover the plate with saran wrap and put in the fridge.


Tuesday, May 28, 2013

Kusa b’Jibn (Zucchini-Cheese Pie)


Sarah and I have been kind of MIA because time goes by so quickly and all of a sudden it's Memorial Day and almost summer vacation. Crazy!! And a new blog post is long overdue because even though this blog is my number 1 priority, so is cleaning the house and cooking dinner, giving Katie a bath, and giving myself a bath, and writing reports for work and hanging out with my husband and well, you get the idea.


Here is a recipe for another one of my grandma's Syrian recipes: Kusa b'Jibn - a Zucchini crustless cheese quiche/pie, similar to Spanach  B'jibn (Spinach Cheese Pie) which Sarah has blogged about in the past. Kusa means zucchini in Syrian and Jibn means cheese. I recently was co-host of a baby shower for a wonderful friend of mine who just gave birth to the most beautiful little girl. The Kusa b'Jibn was a hit by all the guests as well as by their husbands who crashed the party at the end.

This is the first time I have ever made Kusa b'Jibn, but I've eaten it many, many times in my life. This is also the first time I have ever seen it this color. When my mom makes it is green. Something to do with the way I cooked the onions turned it brown. The pictures would look better if it was green, probably, but either way: DELICIOUS!!

Kusa b'Jibn 

1) 5 medium sized zucchinis, peeled and sliced
2) 1 onion, diced
3) 1 container (16 oz) of cottage cheese (fat free, 2%, 4% - your choice, I used 4%)
4) 8 oz cheddar cheese, grated
5) 3 eggs
6) salt & pepper to taste

Put the onion and zucchini in a pot with a small amount of oil and cook until soft (approximately 20 minutes). Meanwhile mix in a medium bowl the cottage cheese, cheddar cheese and eggs. Add some salt and pepper to taste. Drain any excess water from the cooked vegetables and add them to the cheese mixture. Put in a casserole dish and bake for 45 minutes UNCOVERED (it should no longer be watery).


Friday, April 5, 2013

Spaghetti - My Grandma's Recipe


Passover is over and I need my Chametz!! Mmmm....I can eat bread again and cereal and oatmeal and pizza and pasta!

This is one of the foods that I have been craving all throughout Pesach and that I crave most often in general. I don't mean out of all of my grandma's recipes. I mean out of all foods in the world. I'm not saying that it's my favorite. I love way too many foods to pick a favorite.  It's one of my favorites, but you'll notice I say that about so many of these recipes. When we went away this summer to Chicago and Denver, my mom offered to cook us a meal for dinner the night we flew back. Without hesitation I chose spaghetti. We ate very well on that trip thanks to my mother-in-law's cooking and the two Kosher restaurants in Denver, but I NEEDED spaghetti!!

This is one of those foods that I grew up on. My grandma would make it for us all the time. This is not Syrian spaghetti.  I only ate Syrian spaghetti (which is also delicious) when I would visit my cousin Ida in the summer. My grandma's recipe was her own creation. Now I make it all the time. Sometimes I make it with whole wheat noodles, sometimes with small curly noodles, whatever I have around. It tastes a little different depending on what shape noodle and if using whole wheat, but it is always delicious.


Grandma's Spaghetti

1) 1 pound spaghetti (or pasta of your choice)
2) 2 teaspoons of oil
3) Chicken - 2 legs and 2 thighs
4)1/2 onion
5) 1/2 can of small tomato paste
6) 1 (15 oz.) can of tomato sauce

Put the oil in the pot and add the chicken. Brown the chicken on all sides. Meanwhile, chop the 1/2 onion into small pieces. Take the chicken out of the pot. Put the onion in the pot and brown for 1-2 minutes. Add 1/2 the can of tomato paste. Add the tomato sauce. Fill the empty can of tomato sauce with water 2x and add to pot. Add the chicken back into the pot. Bring to a boil, cover and simmer. Cook for 1.5-2 hours.

When the sauce is almost ready, boil the spaghetti, but leave them hard. Add to the boiling sauce for 10 minutes and then shut the gas. 

Note: The sauce can be made ahead of time and frozen. 


By the way: Back when this blog was still about adding peanut butter and pesto to my grandma's recipes, Sarah and I added both pesto and peanut butter to our spaghetti. Actually, only Sarah tried it because I was pregnant and had a terrible peanut butter aversion. I never ended up publishing these pictures (until today) and then we decided to do away with our experiment, but here's to the good old days:


Sarah loved the addition of pesto to the spaghetti. SUCCESS!


She was not a fan of the spaghetti and peanut butter, however.  FAIL!


One more thing: What do you think of our blog's new look? We're probably going to still tweak it here and there and we would love any suggestions you might have!

Thursday, March 21, 2013

Year Round Cookies Perfect for Passover (Flourless and Gluten Free)


I found this recipe ages ago on the blog Everybody Likes Sandwiches. These cookies are delicious and I make them all the time. These are not gluten free cookies or Kosher for Pesach cookies, they are normal, every day cookies that just so happen to be gluten free/Kosher for Pesach. Got it? These are yummy. They're fudgy/nutty cookies that also have a meringue like texture. You could use any nut of your choice. This time I made them with almonds, but I usually make them with walnuts or pecans. In fact, if you want to be adventurous, you don't even have to use nuts. You could use chocolate chips/coconut/mint chips/anything or all of the above instead. In fact, the recipe that I adapted this from called for sunflower seeds and cocoa nibs. Enjoy these on Passover/Enjoy these on Easter/Enjoy these with your gluten free friends/Enjoy these with your allergy-free friends/Enjoy these any day of the year!


chocolate puddle cookies

1) 3 c icing sugar (aka powdered sugar)
2) 2/3 c cocoa
3) 1/2 t fine sea salt
4) 1 c toasted almonds (chopped)
5) 4 large egg whites
6) 1 t vanilla extract

Preheat oven to 350F. In a large bowl, mix together icing sugar, cocoa, and salt. Add in nuts. In a small bowl, stir together the egg whites and vanilla and then pour into the nut/cocoa/sugar mixture. Stir until everything is well combined.
Line cookie sheets with parchment or silpat and then drop batter using a tablespoon. Bake for 13-15 minutes. You will know that they are ready when the cookies lose their shine and become matte. Wait until cooled before you lift the cookies off the tray (using a spatula) and place them on the cooling rack.If you move them to soon you will find yourself with a chocolatey (delicious) mess.

Tuesday, February 19, 2013

Meat Fila

MEAT FILA - A HAMENTASHEN TWIST


I thought that meat fila was an appropriate food to make this time of the year as it is three sided just like a hamentashen. A hamentashen is a three sided jelly filled cookie eaten on the holiday of Purim to symbolize the "ears of Haman", the enemy who was defeated on Purim. Meat Fila  is a three sided meat filled pastry that could be a fun savory twist on the ordinary hamentashen, perfect to eat at your Purim Seudah (meal). (If you're having a dairy meal, the cheese fila would work great, too.)

I used the tadbileh recipe for the meat filling. Filling the fila can be fun when you do it with someone else, so Mike very graciously agreed to help me. I cut the fila dough in half and we got to work.
 If you have the patience and extra time, cut it into thirds, they're better smaller and make more. Trust me, these go fast and are a real crowd pleaser.
I filled a little cup with vegetable oil and we got to work. After a few attempts, I fired Mike and he quit at the same time. He just couldn't get the hang of it, though in retrospect his triangles were quite nice and next time I'm not letting him off that easy.  But it was an amicable parting and he kept me company the whole time. He kept me entertained by quizzing me about Freaks and Geeks, one of our favorite shows.
Mike's Fila - looks more like a witch's hat than Haman's ears!

Despite Mike's difficulty with folding the fila, it's actually quite simple. First, put the two piles of fila on top of each other. You want to work somewhat fast because the fila dough dries up when it is out too long and becomes difficult to work with. I covered the fila dough with the plastic that it came with to keep it moist. Take each piece, one at a time of course, and spread oil on it with your pastry brush and then fold in half.
Now put a little bit of tedbileh on each corner and fold into the shape of a triangle (up and down, like a flag). 

After they are folded place them on a tray. When they are all filled, brush the tops of the fila with oil and sprinkle sesame seeds on top.

They are now ready to be heated up or frozen for later. Freeze them on the trays so that they don't all stick together and later move them into a Tupperware. Put wax paper between each layer so that they don't stick together.

MEAT FILA

What you need:
1)1 package of fila dough
2)Oil (pour a little in a small cup, you can add as needed)
3)1 recipe of tadbileh
4)Pastry Brush
5)Sesame Seeds (Optional)

Open the package of fila dough (usually it is sold in the frozen section, so make sure it is defrosted before you use it.) Cut the fila dough in half and place the 2 piles on top of each other.

Take one piece of fila and use the pastry brush to brush the oil onto it. Now fold it in half, using the oil to help seal it. Take a small spoonful of the tadbileh and place it on the end of the fila and fold over into a triangle and continue folding until you get to the end (it's like folding a flag.) Repeat with each piece of fila. As  you complete one, put it on an ungreased baking sheet. Put them on the tray with the points facing inwards, so that 4 filas make a square (like in the pictures above.) When the trays is full spread oil on top of all the fila and sprinkle sesame seeds on top (optional.) Now you can either bake or freeze them or both.

Freeze them on a tray so that they don't stick together. Then move them to a Tupperware and make sure to put wax paper between each layer.

Bake on 350 degrees on a baking sheet lined with parchment paper for 30 minutes or until slightly brown and toasty.

Wednesday, February 13, 2013

Tadbileh (Ground Beef Filling)

Tadbileh is a ground beef filling. There are many (delicious) Syrian foods that require being stuffed with Tadbileh. This ground beef mixture is absolutely delicious and can be eaten on its own as well. We had it for dinner last night with hummas, tehina, pita, and, sauteed onions and mushrooms.

Tadbileh with Hummas and Tahina Mixture Garnished with Paprika and Cilantro

I made this for dinner last night because I wanted to make something easy. I was so exhausted even though it was only Monday. This is such a great meal for when you are just too tired to make a fuss. It fills you up, and isn't it just so impressive looking?


First you saute an onion.
Then you add the meat and continue sauteing, breaking it up with a fork or your hands. 
When the meat has browned and there's just about a teaspoon left of liquid, add the spices. (I just threw out most of the liquid because my meat was browned and I didn't feel like waiting for the liquid to be absorbed) My grandma flavored it with salt, allspice, and white pepper. Sometimes, I use cinnamon in addition to the other spices. Last night I left the cinnamon out. I kept it authentic, Grandma :)
Experiment with the flavors yourself and see what you like best. 
And then have fun plating it. Last night I put the Hummas/Tehina mixture in the middle of the plate. Sometimes I do it the other way around and put the meat in the middle and the Hummas/Tahina all around. I used store-bought Hummas and homemade Tahina. And then I just mixed them together and sprinkled the mixture with paprika to make it pretty. 
We stuffed a pita with the Hummas/Tahina mixture, the meat, and the sauteed mushrooms and onions. 
It was a real fun meal and tasted like we were eating in a restaurant. 

Tadbileh (Ground Beef Filling)

1)1 onion, chopped
2) 1 tablespoon oil
3)1 pound ground beef
4)2 teaspoons allspice (I like my meat flavorful. If you are not familiar with all spice, I suggest starting with 1 teaspoon, tasting it, and adding as needed)
5)1 teaspoon kosher salt
6)1 teaspoon cinnamon (optional)

Sautee the onion in the oil over medium-high heat until soft but not brown, about 4 minutes. Add the meat and continue sauteing. Break up the meat, as you are adding it , with a fork or your hands. Sautee until the meat is fully brown (about 10 minutes) or until all but 1 teaspoon of the liquid has been absorbed.  Add the allspice, salt, and cinnamon if using. Taste and add as needed.


Wednesday, January 16, 2013

Shurba - Syrian Chichen Soup with Rice


I made Shurba for dinner on Thursday night and again Sunday night. It was the perfect dinner for this cold weather that LA has been experiencing. (We recently were in New York and Chicago and know what REAL cold actually is, but even though it could be A LOT colder, LA still has been cold for LA).

Jimmy Kimmel made me laugh with his bit about LA's overreaction to the cold.

On Thursday I locked my keys in my car and waited in extremely windy weather for my dad to come and rescue me (Thank you so much, dad!) and was so beyond grateful that  by coincidence Shurba was cooking on the stove, waiting for me to come home. I had no idea when I had put up the soup earlier that day how much I would need that soup when I arrived home still shivering from being stuck in the freezing wind for 20ish minutes.


I took pictures of the soup on Thursday and they came out looking disgusting. I could not post those pictures on this blog!! Saturday night I got some sort of bug and was sick until Sunday afternoon. So on Sunday I figured that Shurba once again would be the perfect dinner. Mike offered to make regular chicken soup, but I decided to make Shurba instead so that this time I could try again and take some pictures that might actually look somewhat decent. Okay, they're not masterpieces. But for pictures quickly shot on my smartphone, I think they'll do.
Shurba - Chicken Soup with Rice
On Thursday, I used brown rice. It was delicious with brown rice, just took longer to cook. The second time I made it, on Sunday, I followed the real recipe and used white rice. I also used a much bigger pot and made a bigger recipe the second time because I found that there wasn't enough on Thursday night. Although that was probably due to the fact that when I came home the brown rice still wasn't cooked so I raised the heat (because I was freezing and in desperate need of soup FAST) which probably caused a lot of the water to boil out. Anyway, it is flu season and I am reading articles that say that this is going to be an especially wicked flu season - so keep this recipe around. It will come in handy. Trust me, this is just what the doctor ordered.


Oh, and when I fed it to Katie I used my mother's trick of adding frozen peas to it. The peas cool off the soup and are also my daughter's absolutely favorite vegetable and add more nutrition to the soup. It was a great idea and Katie loved it!

Shurba - Syrian Rice Chicken Soup

1)1 package of bones/necks/or wings (I used wings)
2)2 chicken thighs
3)1 onion
4)1 tablespoon salt
5)1 teaspoon white pepper
6) 3/4 glass of rice

Put the chicken a pot with 5 glasses of water. Skim when it comes to a boil. Add the onion whole, salt, and pepper. Cook on low for approximately 1 hour (or until chicken is cooked). Add the rice and stir. Bring back to a boil and then lower the flame, cover, and cook until thickened (about 20 minutes if you use white rice, 40 minutes if you use brown). Taste and add salt or pepper as needed. 

If you have leftovers you may find that the rice has absorbed a lot of water and it is more rice than soup. Just add more water, heat, and add salt if needed. Or just eat it the next day as a rice dish. 


Wednesday, December 19, 2012

My Husband was on TV Peanut Butter Cookies


Anyone who knows my husband knows about his crazy good memory. This memory of his often puts him in the center of attention. Well, it was no exception when he went to the Jeff Probst show as an audience member of a Survivor-themed episode and ended up being interviewed on TV by Jeff Probst, himself, because of his ability to remember the order that every single Survivor player on every single season (there have been 25 seasons so far) was voted off. He is the ultimate Survivor fan and he got to prove it to the world.

Mike Showing Off on the Jeff Probst Show!

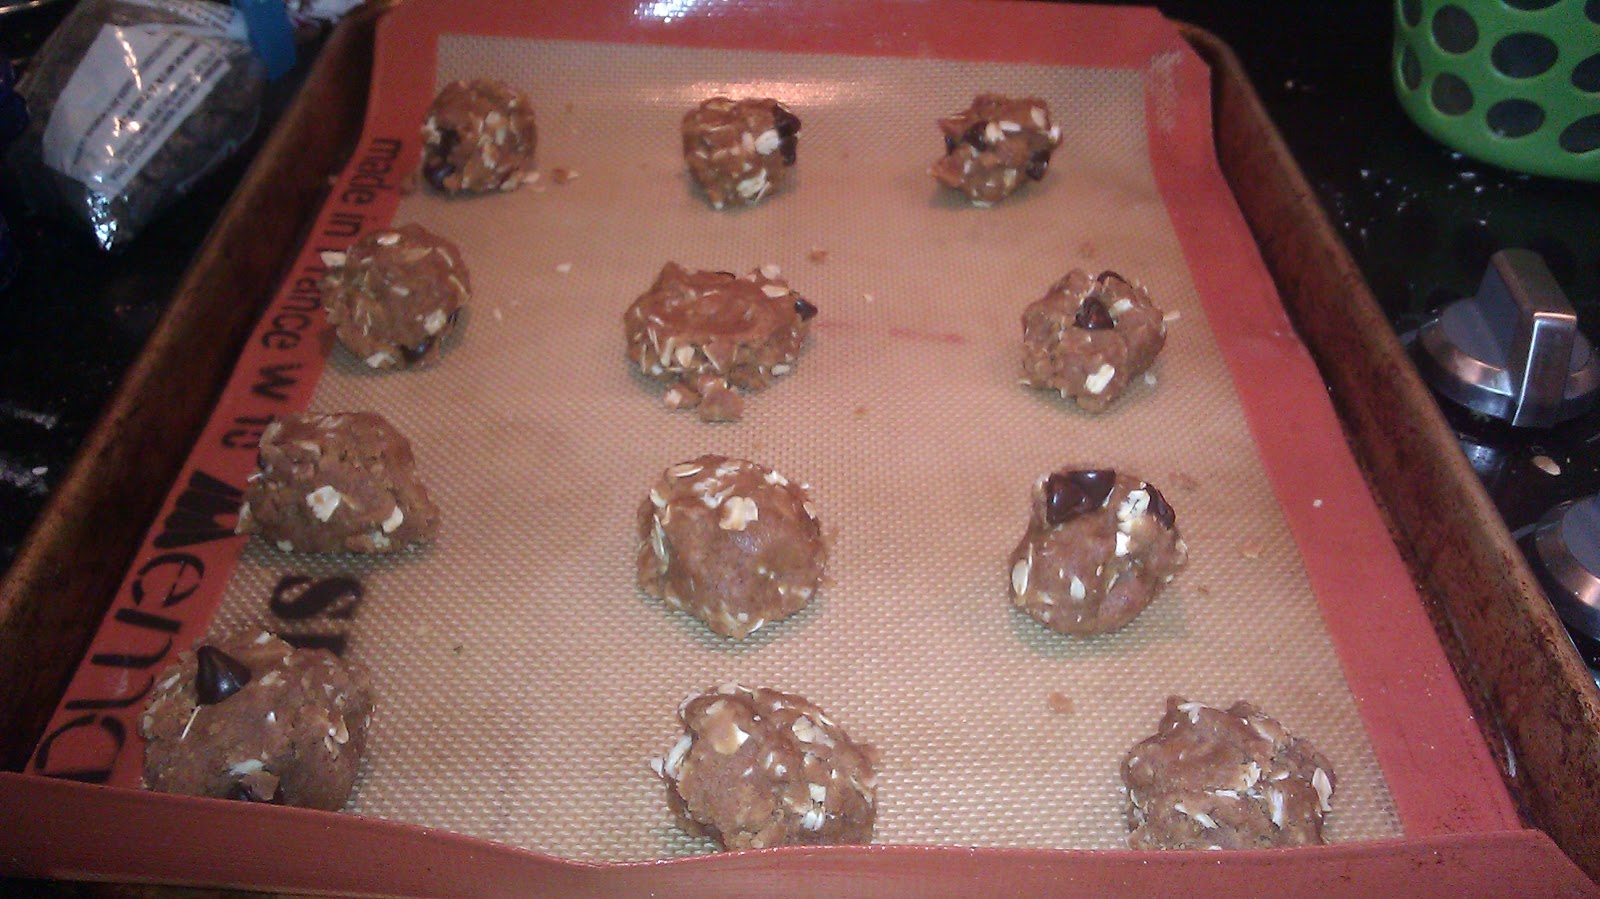
It was so cool watching him on TV and definitely a cause for celebration. Mike is always begging me to bake cookies. "Can you just make normal cookies? Not your quinoa, healthy, weird experiments." One of his favorite cookies are these peanut butter cookies. They are absolutely delicious. Haha! Joke's on him. What he doesn't know is that they ARE healthy and that his celebration cookies were very much an experiment. No quinoa, though. I bought a container of peppermint (his favorite) ice cream and figured if the cookies were a disaster, there was a backup plan. This recipe originally came from the blog Handle the Heat (before my adjustments) and it is a hit every time I make it. I have given the recipe to many family members. 

So, yeah, this recipe is not one of my grandmother's recipe. But, this blog is also a celebration of peanut butter. Pesto recipes will also be making appearances :)


I had been planning on surprising Mike with these cookies all day. On my drive home I realized I didn't have eggs. I was so disappointed until I remembered that I had learned from Pinterest that flax seed can substitute for eggs. When I got home I saw that Mike had bought eggs, but even so, I was determined to follow through with my experiment and see what happens when you substitute flax seeds for eggs.


The batter was more dry than usual, but the cookies turned out surprisingly to be more moist than ever. They were absolutely delicious and Mike had no idea that anything was different and gobbled them up. And they were so super healthy! This was such a success, next time I may try and make them even more healthy by cutting down on the sugar.

Perfect Vegan Peanut Butter Cookies


(Yup, I used the Kirkland Peanut Butter that was recalled, only because it had already been opened and no one had gotten sick from it. This is the best peanut butter ever. Each container has such a generous amount of peanut butter in it, it mixes evenly, and is delicious. Too bad that it was getting people sick, huh?  I have 3 more in my cabinet which I will regretfully be returning the next time I go to Costco.)

The Best Peanut Butter Cookies - Healthy and Vegan

1) 1 cup peanut butter
2) 1 cup brown sugar 
3) 2 tablespoons of flax seed mixed with 6 tablespoons of water (or two eggs if you don't have flax sseed)
4) 1/2 cup whole wheat flour
5) 1/2 cup old fashioned oats
6) 1 teaspoon baking soda
7) 1/2 cup chocolate chips

Preheat oven to 350 degrees and spray baking sheet with PAM or line with parchment paper. Beat peanut butter and brown sugar with an electric hand mixer on medium speed until incorporated. Add the flax seed and water mix, slowly, until mixed in. Add in flour, oats, and baking soda. Stir in chocolate chip with a fork or spatula. Drop balls of dough onto the baking sheets. This recipe made 2 trays of 12. Bake for 10 minutes. Cool on a cooling rack. 

Friday, December 7, 2012

Cheese Ejjeh


Another version of ejjeh (Syrian Latkes). This one is with cheese instead of meat. It isn't the healthiest food, that's for sure, but Chanukah comes but once a year. (I don't suggest eating this all eight days, though.) 

It is essentially a cheese omelet, as the ingredients are just egg and cheese. 
But it is the cheesiest cheese omelet ever. 
And did I mention it’s fried! 

By the way, a fellow half-Syrian friend of mine (shout out to Dave!) told me that 'ejjeh' means 'cake'. 
 If you are a cheese lover than this recipe is for you! 
Doesn't it look good?
           And just like the meat ejjeh, you can eat this in a sandwich with tomato and lettuce. 
I was out of lettuce and tomato, so we had to do without. 
But there was no way I was making dinner without something healthy. So I sauteed mushroom, eggplant, and pepper for the side. That way I got to enjoy my fried cheese sandwich guilt free. 

Cheese Ejjeh

1)8 oz. of cheese (mozzarella, cheddar, I used Monterey Jack)
2)3 eggs & 1 egg yolk
3)salt & pepper to taste
4)oil for frying

In a bowl, mix together all of the ingredients.  Heat oil on the stove. Drop 3 large spoonfuls of cheese mixture and cook for 2 minutes on each side (until it bubbles). Continue until the cheese mixture is all used up, stacking the pancakes on a plate lined with paper towels to absorb the extra oil.